
Thymeleaf Page Layouts
Introduction
Usually websites share common page components like the header, footer, menu and possibly many more. These page components can be used by the same or different layouts. There are two main styles of organizing layouts in projects: include style and hierarchical style. Both styles can be easily utilized with Thymeleaf without losing its biggest value: natural templating.
Include-style layouts
In this style pages are built by embedding common page component code directly within each view to generate the final result. In Thymeleaf this can be done using Thymeleaf Standard Layout System:
<body>
    <div th:insert="footer :: copy">...</div>
</body>
The include-style layouts are pretty simple to understand and implement and in fact they offer flexibility in developing views, which is their biggest advantage. The main disadvantage of this solution, though, is that some code duplication is introduced so modifying the layout of a large number of views in big applications can become a bit cumbersome.
Hierarchical-style layouts
In hierarchical style, the templates are usually created with a parent-child relation, from the more general part (layout) to the most specific ones (subviews; e.g. page content). Each component of the template may be included dynamically based on the inclusion and substitution of template fragments. In Thymeleaf this can be done using Thymeleaf Layout Dialect.
The main advantages of this solution are the reuse of atomic portions of the view and modular design, whereas the main disadvantage is that much more configuration is needed in order to use them, so the complexity of the views is bigger than with Include Style Layouts which are more “natural” to use.
Example Application
All the samples and code fragments presented in this article are available on GitHub at https://github.com/thymeleaf/thymeleafexamples-layouts
Thymeleaf Standard Layout System
Thymeleaf Standard Layout System offers page fragment inclusion that is similar to JSP includes, with some important improvements over them.
Basic inclusion with th:insert and th:replace
Thymeleaf can include parts of other pages as fragments (whereas JSP only includes complete pages) using th:insert (it will simply insert the specified fragment as the body of its host tag) or th:replace (will actually substitute the host tag by the fragment’s). This allows the grouping of fragments into one or several pages. Look at the example.
The home/homeNotSignedIn.html template is rendered when the anonymous user enters the home page of our application.
Class thymeleafexamples.layouts.home.HomeController
@Controller
class HomeController {

    @GetMapping("/")
    String index(Principal principal) {
        return principal != null ? "home/homeSignedIn" : "home/homeNotSignedIn";
    }

}
Template home/homeNotSignedIn.html
<!DOCTYPE html>
<html>
<head>
...
</head>
<body>
...
<div th:replace="fragments/header :: header">
<!-- ============================================================================ -->
<!-- This content is only used for static prototyping purposes (natural templates)-->
<!-- and is therefore entirely optional, as this markup fragment will be included -->
<!-- from "fragments/header.html" at runtime. -->
<!-- ============================================================================ -->
<div class="navbar navbar-inverse navbar-fixed-top">
<div class="container">
<div class="navbar-header">
<a class="navbar-brand" href="#">Static header</a>
</div>
<div class="navbar-collapse collapse">
<ul class="nav navbar-nav">
<li class="active"><a href="#">Home</a></li>
</ul>
</div>
</div>
</div>
</div>
<div class="container">
<div class="hero-unit">
<h1>Test</h1>
<p>
Welcome to the Spring MVC Quickstart application!
Get started quickly by signing up.
</p>
<p>
<a href="/signup" th:href="@{/signup}" class="btn btn-large btn-success">Sign up</a>
</p>
</div>
<div th:replace="fragments/footer :: footer">© 2016 The Static Templates</div>
</div>
...
</body>
</html>You can open the file directly in a browser:
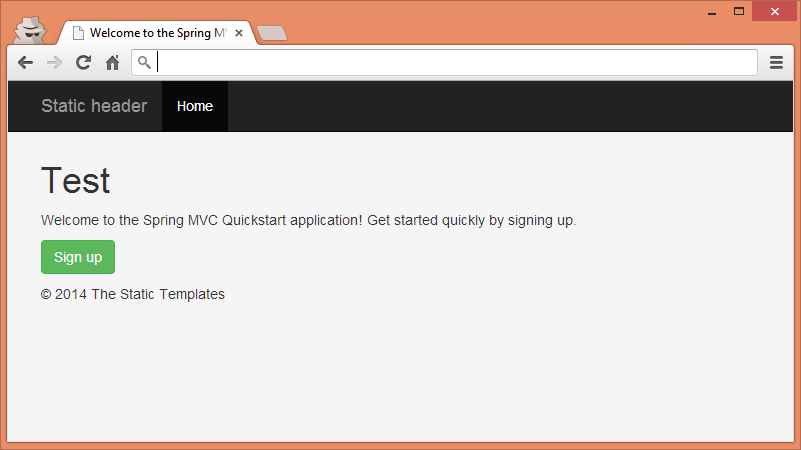
In the above example, we are building a page that consists of page header and page footer. In Thymeleaf all fragments can be defined in a single file (e.g. fragments.html) or in a separate files, like in this particular case.
Let’s shortly analyze the inclusion statement:
<div th:replace="fragments/header :: header">...</div>The first part of the statement, fragments/header, is a template name that we are referencing. This can be a file (like in this example) or it can reference to the same file either by using the this keyword (e.g. this :: header) or without any keyword (e.g. :: header). The expression after double colon is a fragment selector (either fragment name or Markup Selector). As you can also see, the header fragment contains a markup that is used for static prototyping only.
Header and footer are defined in the following files:
Template fragments/header.html
<!DOCTYPE html>
<html>
<head>
...
</head>
<body>
<div class="navbar navbar-inverse navbar-fixed-top" th:fragment="header">
<div class="container">
<div class="navbar-header">
<button type="button" class="navbar-toggle" data-toggle="collapse" data-target=".nav-collapse">
<span class="icon-bar"></span>
<span class="icon-bar"></span>
<span class="icon-bar"></span>
</button>
<a class="navbar-brand" href="#">My project</a>
</div>
<div class="navbar-collapse collapse">
<ul class="nav navbar-nav">
<li th:classappend="${module == 'home' ? 'active' : ''}">
<a href="#" th:href="@{/}">Home</a>
</li>
<li th:classappend="${module == 'tasks' ? 'active' : ''}">
<a href="#" th:href="@{/task}">Tasks</a>
</li>
</ul>
<ul class="nav navbar-nav navbar-right">
<li th:if="${#authorization.expression('!isAuthenticated()')}">
<a href="/signin" th:href="@{/signin}">
<span class="glyphicon glyphicon-log-in" aria-hidden="true"></span> Sign in
</a>
</li>
<li th:if="${#authorization.expression('isAuthenticated()')}">
<a href="/logout" th:href="@{#}" onclick="$('#form').submit();">
<span class="glyphicon glyphicon-log-out" aria-hidden="true"></span> Logout
</a>
<form style="visibility: hidden" id="form" method="post" action="#" th:action="@{/logout}"></form>
</li>
</ul>
</div>
</div>
</div>
</body>
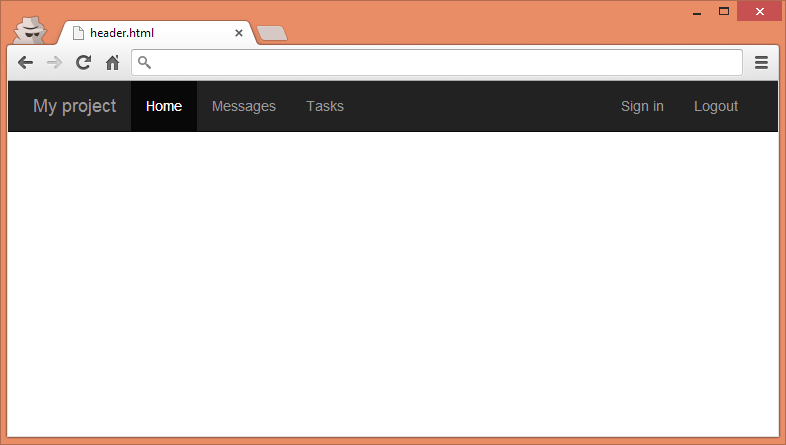
</html>…which we can open directly in a browser:
And template fragments/footer.html
<!DOCTYPE html>
<html>
<head>
...
</head>
<body>
<div th:fragment="footer">
© 2016 Footer
</div>
</body>
</html>Note how that the referenced fragments are specified with th:fragment attributes. This way we can define multiple fragments in one template file, as it was mentioned earlier.
What is important here, is that all the templates can still be natural templates and can be viewed in a browser without a running server.
Including with Markup Selectors
In Thymeleaf, fragments don’t need to be explicitly specified using th:fragment at the page they are extracted from. Thymeleaf can select an arbitrary section of a page as a fragment (even a page living on an external server) by means of its Markup Selector syntax, similar to XPath expressions, CSS or jQuery selectors.
<div th:insert="https://www.thymeleaf.org :: section.description" >...</div>The above code will include a section with class="description" from thymeleaf.org.
In order to make it happen, the template engine must be configured with UrlTemplateResolver:
@Bean
public SpringTemplateEngine templateEngine() {
    SpringTemplateEngine templateEngine = new SpringTemplateEngine();
    templateEngine.addTemplateResolver(new UrlTemplateResolver());
    ...
    return templateEngine;
}
For the Markup Selector syntax reference checkout this section in Thymeleaf documentation: Markup Selector syntax.
Using expressions
In templatename :: selector, both templatename and selector can be fully-featured expressions. In the below example we want to include different fragments depending on a condition. If the authenticated user is an Admin, we will show a different footer than for a regular user:
<div th:replace="fragments/footer :: ${#authentication.principal.isAdmin()} ? 'footer-admin' : 'footer'">
© 2016 The Static Templates
</div>fragments/footer.html has slightly changed, as we need to have two footers defined:
<!DOCTYPE html>
<html>
<head>
...
</head>
<body>
<!-- /* Multiple fragments may be defined in one file */-->
<div th:fragment="footer">
© 2016 Footer
</div>
<div th:fragment="footer-admin">
© 2016 Admin Footer
</div>
</body>
</html>Parameterized inclusion
Fragments can specify arguments, just like methods. Whenever they are explicitly specified with a th:fragment attribute, they can provide an argument signature that can then be filled in with arguments from the calling th:insert or th:replace attributes.
Examples talk best. We can use parameterized inclusion in many contexts but one real life context is displaying messages on different pages of our application after successful form submission. Let’s look at the signup process in the application:
@PostMapping("signup")
String signup(@Valid @ModelAttribute SignupForm signupForm,
        Errors errors, RedirectAttributes ra) {

    if (errors.hasErrors()) {
        return SIGNUP_VIEW_NAME;
    }
    Account account = accountRepository.save(signupForm.createAccount());
    userService.signin(account);
    // see /WEB-INF/i18n/messages.properties and /WEB-INF/views/homeSignedIn.html
    MessageHelper.addSuccessAttribute(ra, "signup.success");

    return "redirect:/";

}
As you can see, after a successful signup the user will be redirected to the home page with a flash attribute filled in. We want to create a reusable and parameterized fragment. This can be done as follows:
<!DOCTYPE html>
<html>
<head>
...
</head>
<body>
<div class="alert alert-dismissable" th:fragment="alert (type, message)" th:assert="${!#strings.isEmpty(type) and !#strings.isEmpty(message)}" th:classappend="'alert-' + ${type}">
<button type="button" class="close" data-dismiss="alert" aria-hidden="true">×</button>
<span th:text="${message}">Test</span>
</div>
</body>
</html>The above alert fragment takes two arguments: type and message. The type is the message type used for styling a message whereas the message is a text that will be shown to the user. We ensure that arguments exist and are not empty by using a th:assert attribute.
In order to include alert in any template we may write the following code (please note, that the value of a variable can be an expression):
<div th:replace="fragments/alert :: alert (type='danger', message=${errorMessage})">...</div>Parameterized fragments let developers create functional-like fragments that are easier to reuse. Read more about parameterized fragments in the Thymeleaf documentation: Parameterizable fragment signatures.
Fragment Expressions
Thymeleaf 3.0 introduced a new type of expression as a part of the general Thymeleaf Standard Expression system: Fragment Expressions:
<div th:insert="~{fragments/footer :: footer}">...</div>The idea of this syntax is to be able to use resolved fragments as any other kind of objects in the template execution context for later use:
<div th:replace="${#authentication.principal.isAdmin()} ? ~{fragments/footer :: footer-admin} : ~{fragments/footer :: footer-admin}">
© 2016 The Static Templates
</div>Fragment expression allows creating fragments in a way such that they can be enriched with markup coming from the calling templates, resulting in a layout mechanism that is far more flexible than th:insert and th:replaceonly.
Flexible Layout Example
The task/layout.html file defines all the fragments that will be used by calling templates. The below header fragment takes breadcrumb parameter that will replace ol markup with its resolved value:
<!--/* Header fragment */-->
<div th:fragment="header(breadcrumb)">
    <ol class="breadcrumb container" th:replace="${breadcrumb}">
        <li><a href="#">Home</a></li>
    </ol>
</div>
In the calling template (task/task-list.html) we will use a Markup Selector syntax to pass the element matching .breadcrumb selector:
<!--/* The markup with breadcrumb class will be passed to the header fragment */-->
<header th:insert="task/layout :: header(~{ :: .breadcrumb})">
    <ol class="breadcrumb container">
        <li><a href="#">Home</a></li>
        <li><a href="#" th:href="@{/task}">Tasks</a></li>
    </ol>
</header>
As a result, the following HTML will be generated for the task/task-list view:
<header>
    <div>
        <ol class="breadcrumb container">
            <li><a href="#">Home</a></li>
            <li><a href="[...]">Tasks</a></li>
        </ol>
    </div>
</header>
Similarly, we can use the same fragment with different breadcrumb in another view (task/task.html):
<header th:insert="task/layout :: header(~{ :: .breadcrumb})">
    <ol class="breadcrumb container">
        <li><a href="#">Home</a></li>
        <li><a href="#" th:href="@{/task}">Tasks</a></li>
        <li th:text="${'Task ' + task.id}">Task</li>
    </ol>
</header>
If there is nothing to be passed to the fragment, we can use a special empty fragment expression - ~{}. It will pass an empty value that will be ignored in the header fragment:
<header th:insert="task/layout :: header(~{})">

</header>
One another feature of the new fragment expression is so called no-operation token that allows the default markup of the fragment to be used in case this is needed:
<header th:insert="task/layout :: header(_)">

</header>
As a result, we will get:
<header>
    <ol class="breadcrumb container">
        <li><a href="#">Home</a></li>
    </ol>
</header>
Fragment Expression enables the customization of fragments in ways that until now were only possible using the 3rd party Layout Dialect. Read more about this topic in the Thymeleaf documentation: Flexible layouts: beyond mere fragment insertion
Fragment inclusion from Spring @Controller
Fragments can be directly specified from a Spring MVC controller, i.e. signup :: signupForm; which can be useful for AJAX controllers that return only a small fragment of HTML to the browser. In the example below, the signup form fragment will be loaded upon AJAX request and the whole signup view - on regular request:
@RequestMapping(value = "signup")
public String signup(Model model,
        @RequestHeader("X-Requested-With") String requestedWith) {

    model.addAttribute(new SignupForm());
    if (AjaxUtils.isAjaxRequest(requestedWith)) {
        return SIGNUP_VIEW_NAME.concat(" :: signupForm");
    }
    return SIGNUP_VIEW_NAME;

}
The fragment is defined in signup/signup.html:
<!DOCTYPE html>
<html>
  <head>
    ...
  </head>
  <body>
    <form method="post"
          th:action="@{/signup}" th:object="${signupForm}" th:fragment="signupForm">
      ...
    </form>
  </body>
</html>
The above fragment is loaded when a new user wants to signup from a home page. The modal dialog will be shown upon clicking Signup button and the content will be loaded via AJAX call (see home/homeNotSignedIn.html).
References
Please check Thymeleaf documentation that describes this topic very thoroughly.
Thymeleaf Layout Dialect
Layout Dialect gives people the possibility of using hierarchical approach, but from a Thymeleaf-only perspective and without the need to use external libraries, like Apache Tiles. Thymeleaf Layout Dialect uses layout/decorator templates to style the content, as well as it can pass entire fragment elements to included pages. Concepts of this library are similar to SiteMesh or JSF with Facelets.
Configuration
To get started with Layout Dialect we need to include it into the pom.xml. The dependency is:
<dependency>
  <groupId>nz.net.ultraq.thymeleaf</groupId>
  <artifactId>thymeleaf-layout-dialect</artifactId>
  <version>4.0.1</version>
</dependency>
We will also need to configure the integration by adding an additional dialect to our template engine:
@Bean
public SpringTemplateEngine templateEngine() {
    SpringTemplateEngine templateEngine = new SpringTemplateEngine();
    ...
    templateEngine.addDialect(new LayoutDialect());
    return templateEngine;
}
No other changes are required.
Creating a layout
The layout file is defined in /WEB-INF/views/task/layout.html:
<!DOCTYPE html>
<html>
<head>
<!--/* Each token will be replaced by their respective titles in the resulting page. */-->
<title layout:title-pattern="$LAYOUT_TITLE - $CONTENT_TITLE">Task List</title>
...
</head>
<body>
<!--/* Standard layout can be mixed with Layout Dialect */-->
<div th:replace="fragments/header :: header">
...
</div>
<div class="container">
<div layout:fragment="content">
<!-- ============================================================================ -->
<!-- This content is only used for static prototyping purposes (natural templates)-->
<!-- and is therefore entirely optional, as this markup fragment will be included -->
<!-- from "fragments/header.html" at runtime. -->
<!-- ============================================================================ -->
<h1>Static content for prototyping purposes only</h1>
<p>
Lorem ipsum dolor sit amet, consectetur adipiscing elit.
Praesent scelerisque neque neque, ac elementum quam dignissim interdum.
Phasellus et placerat elit. Lorem ipsum dolor sit amet, consectetur adipiscing elit.
Praesent scelerisque neque neque, ac elementum quam dignissim interdum.
Phasellus et placerat elit.
</p>
</div>
<div th:replace="fragments/footer :: footer">© 2014 The Static Templates</div>
</div>
</body>
</html>We can open the file directly in a browser:
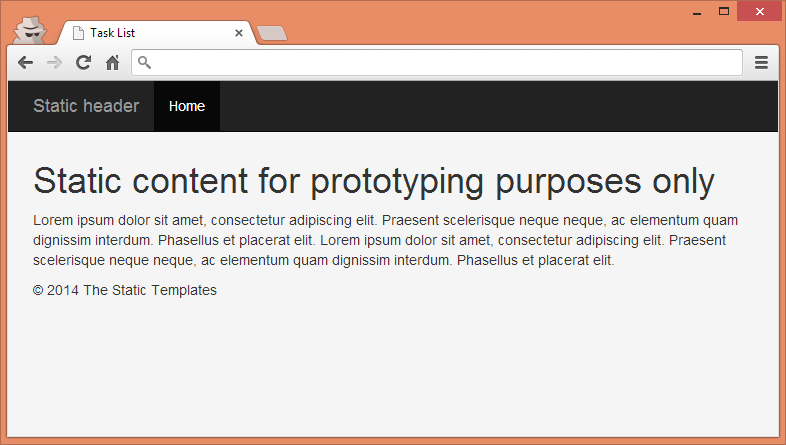
The above file is our decorator for content pages we will be creating in the application. The most important thing about the above example is layout:fragment="content". This is the heart of the decorator page (layout). You can also notice, that header and footer are included using Standard Thymeleaf Layout System.
The content page looks as follows (WEB-INF/views/task/list.html):
<!DOCTYPE html>
<html layout:decorate="~{task/layout}">
  <head>
    <title>Task List</title>
    ...
  </head>
  <body>
    <!-- /* Content of this page will be decorated by the elements of layout.html (task/layout) */ -->
    <div layout:fragment="content">
      <table class="table table-bordered table-striped">
        <thead>
          <tr>
            <td>ID</td>
            <td>Title</td>
            <td>Text</td>
            <td>Due to</td>
          </tr>
        </thead>
        <tbody>
          <tr th:if="${tasks.empty}">
            <td colspan="4">No tasks</td>
          </tr>
          <tr th:each="task : ${tasks}">
            <td th:text="${task.id}">1</td>
            <td><a href="view.html" th:href="@{'/' + ${task.id}}" th:text="${task.title}">Title ...</a></td>
            <td th:text="${task.text}">Text ...</td>
            <td th:text="${#calendars.format(task.dueTo)}">July 11, 2012 2:17:16 PM CDT</td>
          </tr>
        </tbody>
      </table>
    </div>
  </body>
</html>
And in the browser it looks like this:
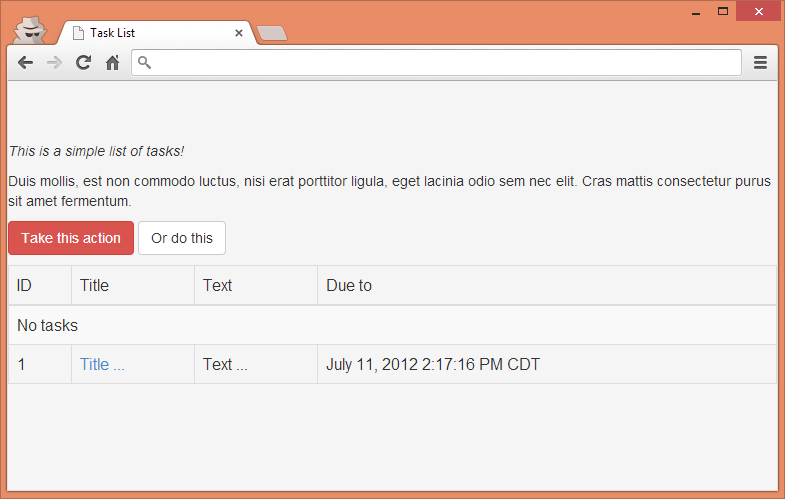
Content of this task/list view will be decorated by the elements of task/layout view. Please note layout:decorate="~{task/layout}" attribute in <html> element. This attribute signals to the Layout Dialect which layout should be used to decorate given view. And please note it is using Thymeleaf Fragment Expression syntax.
And what about Natural Templates using the Layout Dialect? Again, possible! You simply need to add some prototyping-only markup around the fragments being included in your templates and that’s it!
Include style approach with Layout Dialect
Layout Dialect supports not only hierarchical approach – it also provides a way to use it in an include-style way (layout:include). Comparing with standard Thymeleaf includes, with Layout Dialect you can pass HTML elements to the included page. Useful if you have some HTML that you want to reuse, but whose contents are too complex to pass by means of parameterized inclusion in standard Thymeleaf dialect.
This is an example of a reusable alert fragment using layout:fragment (task/alert.html):
<!DOCTYPE html>
<html>
  <body>
    <th:block layout:fragment="alert-content">
        <p>Duis mollis, est non commodo luctus, nisi erat porttitor ligula...</p>
        <p>
            <button type="button" class="btn btn-danger">Take this action</button>
            <button type="button" class="btn btn-default">Or do this</button>
        </p>
    </th:block>
  </body>
</html>
The calling of the above fragment may look as follows (task/list.html):
    <div layout:insert="~{task/alert :: alert}" th:with="type='info', header='Info'" th:remove="tag">
        <!--/* Implements alert content fragment with simple content */-->
        <th:block layout:fragment="alert-content">
            <p><em>This is a simple list of tasks!</em></p>
        </th:block>
    </div>
Or:
    <div layout:insert="~{task/alert :: alert}" th:with="type='danger', header='Oh snap! You got an error!'" th:remove="tag">
        <!--/* Implements alert content fragment with full-blown HTML content */-->
        <th:block layout:fragment="alert-content">
           <p>Duis mollis, est non commodo luctus, nisi erat porttitor ligula...</p>
            <p>
                <button type="button" class="btn btn-danger">Take this action</button>
                <button type="button" class="btn btn-default">Or do this</button>
            </p>
        </th:block>
    </div>
In this case, the entire alert-content of task/alert (/WEB-INF/views/task/alert.html) template will be replaced by custom HTML above.
References
Please check out the Layout Dialect documentation that describes this topic very thoroughly. You will definitively find some more advanced examples than in this article.
You can find the documentation here: Layout Dialect.
Other Layout Options
For some of the developers neither of the solutions presented before is sufficient. Thymeleaf Standard Layout System is not enough and using external libraries is not an option. In that case, the custom solution may be the way to go.
Thymeleaf Custom Layout
One of such a solutions is well described in this blog post: Thymeleaf template layouts in Spring MVC application with no extensions. The idea of this solution is really simple. Let’s visualize that with an example:
Example view file (1):
<!DOCTYPE html>
<html>
  <head>
    ...
  </head>
  <body>
    <div class="container" th:fragment="content">
      <p>
        Hello <span th:text="${#authentication.name}">User</span>!
        Welcome to the Spring MVC Quickstart application!
      </p>
    </div>
  </body>
</html>
And the layout file (2):
<!DOCTYPE html>
<html>
  <head>
    ...
  </head>
  <body>
    <div th:replace="fragments/header :: header">Header</div>
    <div th:replace="${view} :: content">Page Content</div>
    <div th:replace="fragments/footer :: footer">Footer</div>
  </body>
</html>
What will happen?
- Controllers return view names, that translate to single Thymeleaf view file (1)
- Before rendering the view, the original
viewNameattribute inModelAndViewobject is replaced with the name of the layout view and the originalviewNamebecomes an attribute inModelAndView. - The layout view (2) contains several include elements:
<div th:replace="${view} :: content">Page Content</div> - The actual view file contains fragments, pulled by the template which embeds the actual view
The project can be found on GitHub.
Summary
In this article, we described many ways of achieving the same: layouts. You can build layouts using Thymeleaf Standard Layout System that is based on include-style approach. You also have powerful Layout Dialect, that uses decorator pattern for working with layout files. Finally, you can easily create your own solution.
Hopefully, this article gives you some more insights on the topic and you will find your preferred approach depending on your needs.