Spring MVC view layer: Thymeleaf vs. JSP
In this article we will compare the same page (a subscription form) created twice for the same Spring MVC application: once using Thymeleaf and another time using JSP, JSTL and the Spring tag libraries.
All the code seen here comes from a working application. You can view or download the source code from its GitHub repo.
Common requirements
Our customers need a form for subscribing new members to a message list, with two fields:
- Email address
- Type of subscription (receive all emails, daily digest)
We will also need this page to be HTML5 and completely internationalizable, extracting all texts and messages from resource files already configured in our MessageSource objects in our Spring infrastructure.
Our application will have two @Controllers, which will contain exactly the same code but will forward to different view names:
SubscribeJspfor the JSP page (thesubscribejspview).SubscribeThfor the Thymeleaf page (thesubscribethview).
We will have the following classes in our model:
Subscriptionform-backing bean with two fields:String emailandSubscriptionType subscriptionType.SubscriptionTypean enum modeling thesubscriptionTypefield of the form, with valuesALL_EMAILSandDAILY_DIGEST.
(In this article we will just focus on the JSP/Thymeleaf template code. If you want to know implementation details for the controller code or Spring configuration, check the source code in the downloadable package)
Doing it with JSP
This is our page:
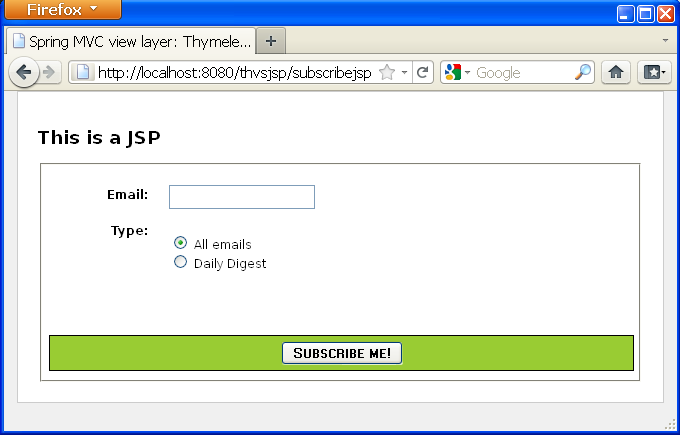
And this is our JSP code, making use of both JSTL (core) and Spring (tags and form) JSP tag libraries:
<%@ taglib prefix="sf" uri="http://www.springframework.org/tags/form" %>
<%@ taglib prefix="s" uri="http://www.springframework.org/tags" %>
<%@ taglib prefix="c" uri="http://java.sun.com/jsp/jstl/core" %>
<%@ page contentType="text/html; charset=UTF-8" pageEncoding="UTF-8"%>
<!DOCTYPE html>

<html>

  <head>
    <title>Spring MVC view layer: Thymeleaf vs. JSP</title>
    <meta http-equiv="Content-Type" content="text/html; charset=UTF-8" />
    <link rel="stylesheet" type="text/css" media="all" href="<s:url value='/css/thvsjsp.css' />"/>
  </head>

  <body>

    <h2>This is a JSP</h2>

    <s:url var="formUrl" value="/subscribejsp" />
    <sf:form modelAttribute="subscription" action="${formUrl}">

      <fieldset>

        <div>
          <label for="email"><s:message code="subscription.email" />: </label>
          <sf:input path="email" />
        </div>
        <div>
          <label><s:message code="subscription.type" />: </label>
          <ul>
            <c:forEach var="type" items="${allTypes}" varStatus="typeStatus">
              <li>
                <sf:radiobutton path="subscriptionType" value="${type}" />
                <label for="subscriptionType${typeStatus.count}">
                  <s:message code="subscriptionType.${type}" />
                </label>
              </li>
            </c:forEach>
          </ul>
        </div>

        <div class="submit">
          <button type="submit" name="save"><s:message code="subscription.submit" /></button>
        </div>

      </fieldset>

    </sf:form>

  </body>

</html>
Doing it with Thymeleaf
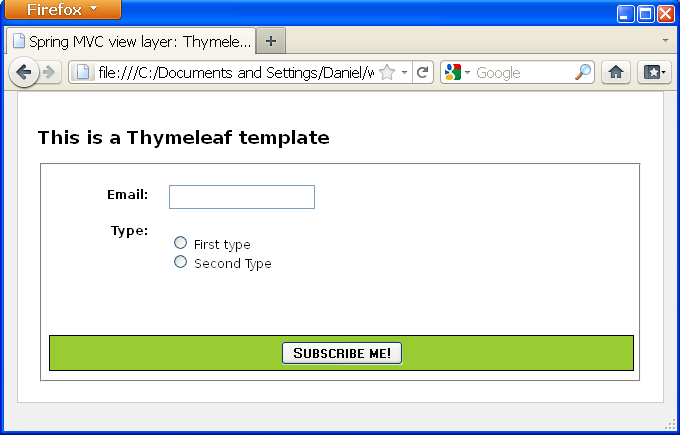
Now, let’s do the same with Thymeleaf. This is our page:
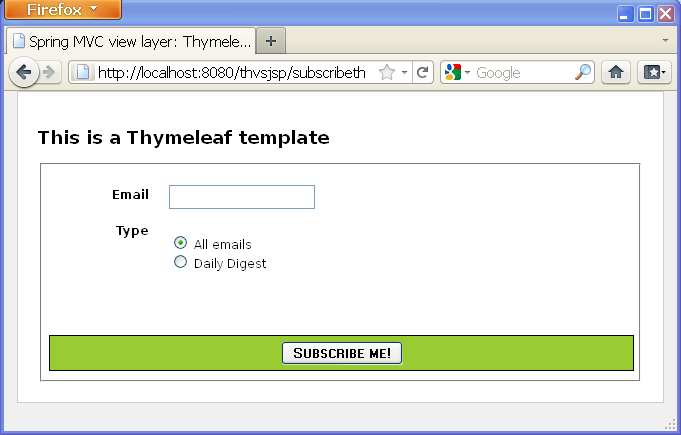
And this is our Thymeleaf code:
<!DOCTYPE html>

<html xmlns:th="http://www.thymeleaf.org">

  <head>
    <title>Spring MVC view layer: Thymeleaf vs. JSP</title>
    <meta http-equiv="Content-Type" content="text/html; charset=UTF-8" />
    <link rel="stylesheet" type="text/css" media="all"
      href="../../css/thvsjsp.css" th:href="@{/css/thvsjsp.css}"/>
  </head>

  <body>

    <h2>This is a Thymeleaf template</h2>

    <form action="#" th:object="${subscription}" th:action="@{/subscribeth}">

      <fieldset>

        <div>
          <label for="email" th:text="#{subscription.email}">Email: </label>
          <input type="text" th:field="*{email}" />
        </div>
        <div>
          <label th:text="#{subscription.type}">Type: </label>
          <ul>
            <li th:each="type : ${allTypes}">
              <input type="radio" th:field="*{subscriptionType}" th:value="${type}" />
              <label th:for="${#ids.prev('subscriptionType')}"
                th:text="#{|subscriptionType.${type}|}">First type</label>
            </li>
            <li th:remove="all"><input type="radio" /> <label>Second Type</label></li>
          </ul>
        </div>

        <div class="submit">
          <button type="submit" name="save" th:text="#{subscription.submit}">Subscribe me!</button>
        </div>

      </fieldset>

    </form>

  </body>

</html>
Things to notice here:
- This looks much more HTML-ish than the JSP version – no strange tags, just some meaningful attributes.
- Variable expressions (
${...}) are Spring EL and execute on model attributes, asterisk expressions (*{...}) execute on the form backing bean, hash expressions (#{...}) are for internationalization and link expressions (@{...}) rewrite URLs. (If you want to know more about this, have a look at the “Getting started with the Standard Dialect in 5 minutes” guide). - We are allowed to have prototype code there: for example, we can set an
Email:text in the label for the first field, knowing that Thymeleaf will substitute it with the internationalized text with keysubscription.emailwhen it executes the page. - We have even been able to add an
<li>for a second radiobutton just for prototyping pleasure. It will be removed when Thymeleaf executes our page.
Let’s change the page style!
Imagine that now our pages are written we suddenly decide that we do not want green anymore for that region around the submit button, but rather a pale blue. Anyway we’re not sure about the exact tone of blue that will fit better, so we will have to try some combinations before deciding on a specific one.
Let’s see the steps we would have to take with each technology:
Changing the page style using JSP
Step 1: Deploy the application into our development server and start it up. Our JSP page will not render without starting the server, so this will be a requirement.
Step 2: Navigate through the pages until we find the one to change. Normally, the page to change will be one among several dozen pages in our application, and it is quite possible that in order to reach it we will need to click links, submit forms and/or query databases.
Step 3: Fire up firebug, dragonfly, or our favourite in-browser web development tool. This will allow us to modify our styles acting directly on the browser’s DOM, and thus see immediate results.
Step 4: Make the colour changes. Probably trying a couple of different tones of blue before deciding on the one we like.
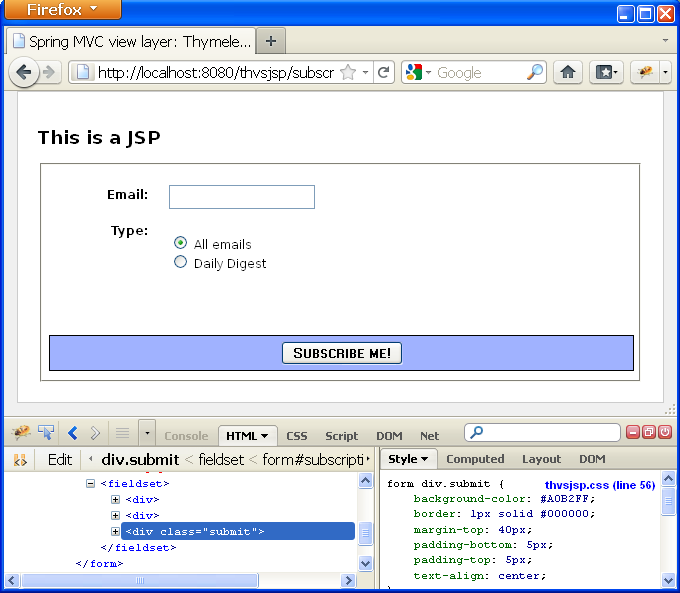
Step 5: Copy-paste the changes into our CSS files.
Done!
Changing the page style using Thymeleaf
Step 1: Double-click on the .html template file itself and let our browser open it. Being a Thymeleaf template, it will show just fine, only with template/prototype data (note the subscription type options):
Step 2: Open the .css file with our favourite text editor. The template file statically links to the CSS in its <link rel="stylesheet" ...> tag (with an href that Thymeleaf substitutes when executing the template by the one generated by th:href). So any changes we make to that CSS will be applied to the static page our browser is displaying.
Step 3: Make the colour changes. As was the case with JSP, we will probably have to try several colour combinations, which will be refreshed in our browser just by pressing F5.
Done!
That was a big difference!
The difference in the number of steps is not really important here (we could also have used firebug with the Thymeleaf template). What is really important is the complexity, the effort and the time required by each of the steps required for JSP. Having to deploy and start the whole application made JSP just lose.
What’s more: think of how this difference would evolve if:
- Our development server was not local but remote.
- Changes didn’t involve only CSS but also adding/removing some HTML code.
- We still hadn’t implemented the required logic in our application to actually reach that page once deployed.
This last point is an important one: what if our application was still being developed, the Java logic needed to show this or other previous pages wasn’t still working alright, and we had to show the new colour to our customer? (or even let him/her choose on the fly!)…
And what about trying to use the JSP as a static prototype?
OK, you can say now, but why did we start the application to modify the JSP instead of just opening it like you did with the Thymeleaf one? Can’t we just do that?.
The short answer is NO.
But let’s try anyway: of course, we will have to rename our file so that its name ends in .html instead of .jsp, but let’s see what happens when we open our browser:
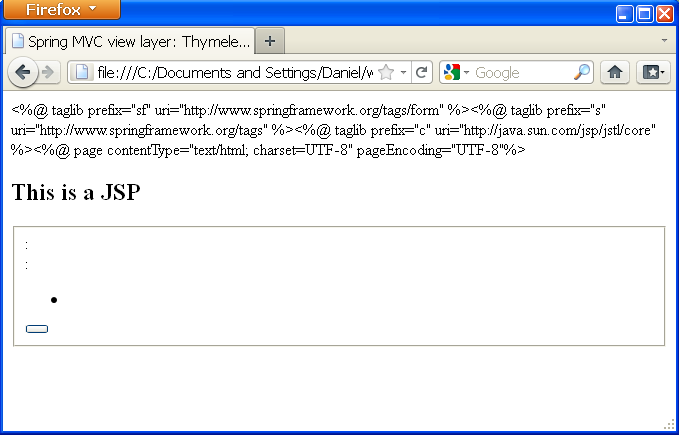
WHAT? Where’s our page gone? Well, it’s still there, but in order to make our page work as JSP we had to add lots of JSP tags and features that made it work wonderfully when executed by our web server… but at the same time made it be HTML no more. And therefore made it undisplayable for a browser.
Again, let’s remind ourselves what the Thymeleaf template looked like when we double-clicked on it:
Definitely not in the same league, right?
Got HTML5?
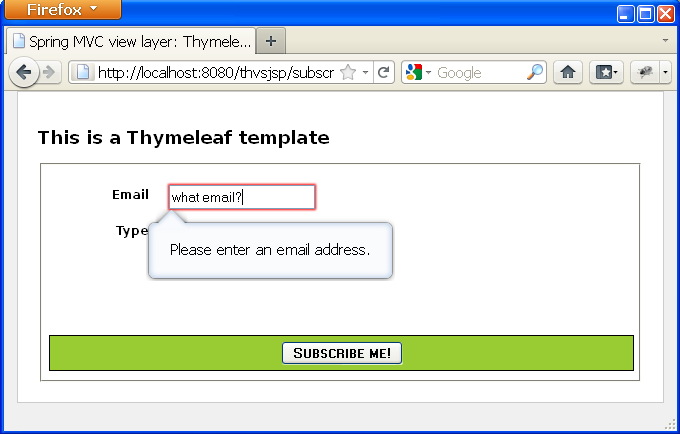
But hey – we said at the beginning that our page was going to be HTML5, so… why don’t we use some of the cool new HTML5 form-related features?
For example, there is now an <input type="email" ...>, which will make our browser check that the text input by users has the shape of an email address. And also, there is a new property for all inputs called placeholder which shows a text in the field that automatically disappears when the input gains focus (usually by the user clicking on it).
Sounds good, doesn’t it? Unfortunately not all browsers support this yet (as of 2011, Opera 11 and Firefox 4 do), but we are safe using these features anyway because all browsers will treat an input of a type they do not understand (email) as a text input, and will silently ignore the placeholder attribute in the same way they ignore Thymeleaf’s th:* ones.
Doing HTML5 with JSP
Before Spring 3.1
Spring MVC’s JSP tag libraries didn’t offer complete support for HTML5 until Spring 3.1, so before this version there was no way to write an email type input tag other than do it in plain HTML, like:
<input type="email" id="email" name="email" placeholder="your@email" value="" />But this was not correct! In Spring MVC we should never write a JSP input field like that, because we wouldn’t be correctly binding our input to the email property of the form-backing bean. In order to do so, we would need to use an <s:eval/> tag, which will apply all the required transformations (like property editors) and make our plain-HTML tag work as if an <sf:email/> tag existed:
<input type="email" id="email" name="email" placeholder="your@email"
       value="<s:eval expression='subscription.email' />" />
Since Spring 3.1
In Spring 3.1 there still is no <sf:email ...> tag, but the existing <sf:input ...> allows us to specify a type attribute with value email, which will work just fine:
<sf:input path="email" type="email" />And this will correctly perform our form bindings :-).
Doing HTML5 with Thymeleaf
Thymeleaf has complete support for HTML5 (even with Spring 3.0), so we will only have to change the type of our input and add a placeholder, and it will work out of the box, correctly binding our property and integrating with Spring MVCs property editors and more importantly, being displayed as a usual input box when displayed as a prototype —something the sf:input tag won’t—:
<input type="email" th:field="*{email}" placeholder="your@email" />Done!